Nothing is more frustrating than when you’re all set to play your guitar, but the amp isn’t working properly. Maybe there’s no sound at all, or maybe it’s making a buzzing or humming noise. Whatever the case may be, it can be overwhelming to troubleshoot the issue on your own. But don’t worry, we’ve got you covered. In this blog, we will dive into everything you need to know about your guitar amp – its components and role in sound production. We will also cover common problems that guitar amps face and provide solutions to overcome them. We’ll touch upon safety measures while troubleshooting and give tips on regular maintenance to prevent future troubles. So, whether you’re a beginner or an experienced player, read on for an expert guide on how to diagnose and fix any issues with your guitar amp.
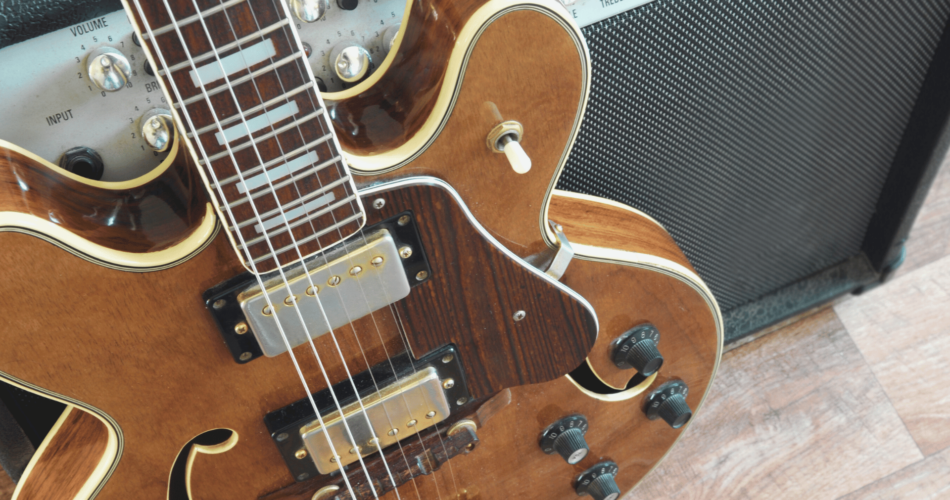
Understanding Your Guitar Amp
Understanding Your Guitar Amp: Your guitar amp consists of essential components such as the preamp, power amplifier, and speaker. The preamp processes the guitar signal, while the power amp amplifies it. Then, the speaker converts the electrical signal into audible sound waves. Understanding the role of each component is crucial for optimal sound production.
Overview of Amp Components
Understanding the internal components of your amplifier is crucial for troubleshooting. The power transformer ensures proper voltage supply, while the circuitry, comprising capacitors, resistors, and audio amplifiers, is essential for sound production. Additionally, the pilot light and power supply are indicators of the amplifier’s health. Caution is advised due to high voltages in tube amplifiers.
Role of an Amp in Sound Production
The guitar’s preamp shapes the electric signal before sending it to the power amp, which further amplifies it and drives the speakers. The amp’s enclosure enhances sound resonance, and the volume knob controls the produced sound. The tube glow in vintage amplifiers indicates operational tubes, not just for aesthetics.
Common Problems with Guitar Amps
If troubleshooting a guitar amp with fuzzy sound, it may resolve trivial issues like faulty cables. Investigating fading sound could reveal power supply problems or faulty tubes. An amp not playing sound may indicate circuitry, fuses, or wiring issues. Understanding why the amp won’t turn on involves checking power sources and inspecting switches and outlets.
Buzzing or Humming Sound
When connecting the guitar to the amp, a faulty cable may cause buzzing or humming sound issues. Excessive hum in the amp can result from faulty electrolytic capacitors. Testing continuity in the amp’s wiring with a multimeter can help identify the source of the hum. Ensuring appropriate grounding and wiring can minimize the risk of hum. Identifying and replacing malfunctioning fuses can resolve buzzing or humming sound problems.
Intermittent Sound Output
Intermittent sound output in the guitar amp could result from loose connections in the amp’s circuitry. Repairing worn-out audio jacks may resolve this issue, as can checking for irregular voltages in the power supply and wiring. Additionally, troubleshooting the preamp and power amp components could reveal the cause of the problem. Moisture, stains, or rust on internal parts should be addressed promptly.
No Sound at All
If your guitar isn’t playing through the amp at all, a faulty power outlet or cord could be the culprit. Investigate the fuse, power supply, and wiring, as well as the preamp and power amp for faults. Identifying and replacing malfunctioning components, such as capacitors, can restore sound output; checking the amp’s audio amplifiers for continuity is also crucial.
Cables and plugs
Properly maintaining and connecting guitar and amp cables is crucial for optimal sound production. High-quality, appropriate rating cables and connectors prevent sound distortion. Regular inspections and cleaning of audio jacks help prevent poor connectivity issues. Identifying and replacing faulty cables and plugs maintains sound quality and reliability.
Safety Measures while Troubleshooting
When troubleshooting guitar amps, understanding the shock hazard associated with high voltages is crucial. Educate yourself on appropriate voltage requirements and power outlet safety. Follow precautions, allow the amp to discharge, and use insulated tools. Regularly inspect and maintain the power supply, fuses, and wiring to prevent accidents. Consider substituting vintage gear with new parts for minimized shock hazard.
Precautions to Prevent Electrical Shocks
When troubleshooting your amp, always remember to turn off and unplug it first to prevent electrical shocks. Use only insulated tools and regularly inspect the power supply and wiring for wear and damage. Educate yourself on the circuitry and potential high voltages to minimize hazards. Substituting faulty parts with new, high-quality components is crucial in preventing shock hazards.
Protecting Your Equipment
Proper maintenance is key to a guitar amp’s longevity and performance. Keep it in a well-ventilated area, away from moisture and extreme temps, and inspect regularly for any wear. Use the correct power supply, turn it off when not in use, and be mindful of shock hazards. Regular checks can prevent malfunctions.
Diagnosing the Problem
When troubleshooting, begin by checking the amp’s power source and continuity of the power cord and fuses using a multimeter. Examine connections for corrosion or stains, and inspect tube-based amps for visible signs of malfunction. Listen for hum, fuzzy sound, or audio distortion to identify potential wiring or circuitry issues.
Checking the Power Supply
When troubleshooting power issues with your guitar amp, start by ensuring the power outlet and cord are in good condition. Inspect the power transformer, electrolytic capacitors, and circuitry for wear or malfunctions. Test the fuse and power supply using a multimeter to verify the correct voltage. Avoid connecting the amp to a higher-rated power outlet to prevent damage. Check for signs of tube glow and potential power supply problems.
Examining the Amp Fuse
When troubleshooting, use a multimeter to test the amp fuse for continuity and ensure it hasn’t blown. Replace any faulty fuses with the appropriate rating. Inspect the fuse holder and wiring for corrosion or damage. Securely seat the fuse to prevent power supply issues. Regularly replace the fuse for routine maintenance.
Inspecting the Speaker Connections
When inspecting speaker connections, review cables for wear or damage. Ensure secure connections to prevent sound loss. Clean audio jacks and connections to remove debris. Test with a multimeter for continuity and quality. Regularly maintain to ensure consistent, high-quality sound output.
Solutions to Common Amp Issues
Troubleshooting a blown amp fuse is crucial; identify the cause and replace it with the right rating fuse. Clean and secure audio jack, speaker connections, and preamp to eliminate crackling and static. Repairing a tube guitar amp involves examining the tube glow, circuitry, and wiring for malfunctions. Seek professional help if DIY troubleshooting doesn’t work.
Fixing a Blown Amp Fuse
If your amp suddenly stops working, it might be due to a blown fuse. To fix this, first identify the cause and perform regular continuity tests. Replace the faulty fuse with the appropriate rating, then clean the fuse holder and wiring connections. Finally, seat the new fuse properly to ensure a reliable power supply.
Resolving Sound Crackling and Static
To eliminate sound crackling and static in the amp, clean and secure the audio jack, speaker connections, and preamp. Regularly test and maintain the connections, use a multimeter to verify continuity, and promptly address any issues to prevent sound quality degradation.
Steps to Repair a Tube Guitar Amp
First, test the tube glow, circuitry, and wiring to identify malfunctions or distortion. Replace faulty tubes, capacitors, and other components for clear sound output. Clean tube contacts to remove debris and corrosion. Regularly maintain and test parts for optimal performance. Seek professional repair services if DIY troubleshooting is ineffective.
When to Seek Professional Help
If DIY troubleshooting and maintenance do not effectively resolve amp issues, seeking professional help is crucial. Qualified techs can diagnose and fix problems like amp not turning on, sound fading in and out, fuzzy sound, or no sound at all. Consulting a professional ensures expert solutions and repairs for complex amp issues.
Identifying Unsolvable Issues
If all troubleshooting measures have been exhausted and the amp still isn’t working, it may be time to seek professional repair or replacement. Check the cables and connections, ensure the amp is powered on with adequate volume, and inspect the tubes for wear or damage.
Finding a Trustworthy Repair Service
Before choosing a repair service, research and read reviews. Look for one specializing in guitar amps, with experienced technicians. Get a detailed cost estimate and turnaround time before agreeing to service. Choose a repair service offering a warranty on their work.
Can Regular Maintenance Prevent Amp Troubles?
Regular maintenance plays a crucial role in preventing amp troubles. By regularly cleaning the exterior and interior to prevent dust buildup and checking and replacing worn out tubes or components, you can ensure the longevity of your amp. Follow manufacturer’s recommendations for maintenance and storage to keep your amp in optimal condition.
Conclusion
In conclusion, troubleshooting guitar amp issues can be frustrating, but with a little knowledge and patience, you can often fix common problems on your own. Understanding the components of your amp and how they contribute to sound production is key. It’s important to take proper safety precautions while troubleshooting and diagnosing any issues. For common problems like buzzing or humming sounds, intermittent sound output, or no sound at all, there are steps you can take to address these issues. From checking the power supply to examining the amp fuse and speaker connections, you can often identify and resolve the problem. However, there may be times when seeking professional help is necessary, especially for issues that are beyond your expertise or require specialized equipment. It’s important to find a trustworthy repair service that can diagnose and fix complex amp problems. Regular maintenance can also help prevent amp troubles in the first place. Cleaning the amp regularly, checking and replacing tubes, and keeping an eye on cables and plugs can go a long way in maintaining optimal performance. By understanding how your guitar amp works and taking the necessary steps to troubleshoot and maintain it, you can ensure that your guitar will play through without any issues, allowing you to focus on your music.